Showing posts with label #Cechantiq. Show all posts

Saturday, February 13, 2021

Fresh makeup look

hari nie Cik Purple nak keluar..
pergi datingg....
valentines kan..
kita amik kesempatan berjalan jalan leee.. 

hari nie fresh look makeup..
simple makeup jeee...
okeyyyy kannn?? 


Love, 

Cik Purple

Friday, January 1, 2021

My Makeup Look for Eleen's Wedds


yuhuuu gaisss...
as per promise.. Cik Purple nak share pasal my makeup kali nie..

the look masa Cik Purple attend wedding Eleen. 
so.. letssss cekidautttt. 


i love my makeup look yang ni..
sebab nampak simple.. nampak natural je..
but menyerlahhh.. and i love it so much.

makeup kali nie.. cik purple more focus bagi warna kat mata... 
sebab.. semalamnya tu balik pkol 4 pagi..
and obviously mata and muka penat.. 
so. with colors.. insyaallah bagi seri pada muka. 


im using Summer Love Eyeshadow pallete for this look

concealer - Mary Kay
foundation - Mary Kay 
Cream Blusher - Lipstick lama yang dah x pakai. 
eyeshadow - Summer Love eyeshadow by Anas Cosmetics
Eyeliner - kedai Eco RM 2.10
Eyebrow - kedai eco RM 2.10
Blusher - Kedai Eco RM 2.10
Contour - Elianto 
Lip balm - lip ice 
Lipstick - TAK DE (x sempat.. terlupa dan tertinggal) 


menyerlah... menawan.. tapi x over.. 


Love, 

Cik Purple

Sunday, December 27, 2020

Makeup dating nk beli brg rmh baru

Hey Whatsupp Guyss

just a quick post i guess.. 

just nak tayang muka chantikkkkkk cik purple je..

makeup sebab nak deting..

nak pergi beli barang untuk rumah baru.. 


color corrector : color corrector pallete (eco shop) 
foundation : foundation (mary kay) 
concealer : perfecting concealer (mary kay) + under eye corrector (mary kay)
blusher : mels bblusher duo pallete (eco shop) 
eyeliner (airwoman eyeliner (ecoshop)
eyebrow : eyebrow pallete (eco shop)
eyeshadow : summer love (anas cosmetics) 
lipmatte : code stella (skinkare cosmetics) 


cantik takkk ??? 


Love, 

Cik Purple

Tuesday, December 22, 2020

Before & After (Mia Lofa)

haloha semuaaa.. 
just nak tempek sini..

before & after mekap kawan cik purple..

lawaaaaaaaa kann..


tak berubah total..
tapi.. serinya memukauuu.. 
kannnnnnnnn..


Love, 

Cik Purple

Tuesday, December 15, 2020

Before & After (Cik Purple)

Hey Whatsupp Guyss

just nak tempek sini..


before & after cik purple mekap..

kalau x mekap.. muka kusam.. muka suram

bila dah mekap.. aduhaii.. lawanyaaa.. 

kan kan kan 


Love, 

Cik Purple

Saturday, July 11, 2020

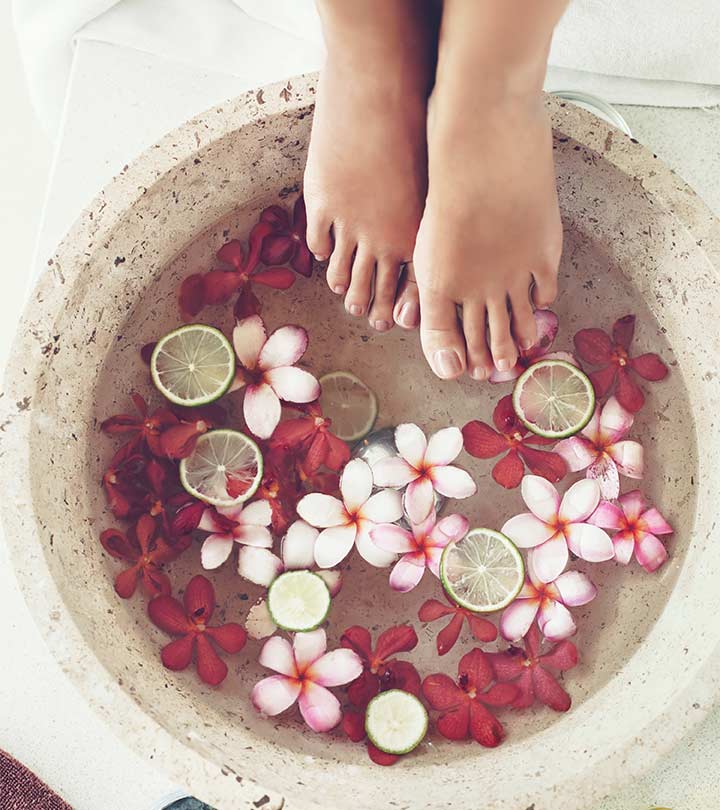
[DIY] Brown Sugar And Olive Oil Exfoliating Foot Scrub

DIY Foot Scrubs – 20 Recipes To Pamper Your Tired Feet

DO-It Yourself
Homemade Brown Sugar & Olive Oil Exfoliating Foot Scrub


You Will Need 

  • 1 tablespoon brown sugar 
  • 1 tablespoon olive oil 
  • 2 drops of essential oil (chamomile or peppermint) 
  • 1 teaspoon baking soda 


Method 

  1. Combine the sugar, olive oil, and baking soda in a bowl. 
  2. Add the essential oil and scrub your feet with the mixture. 
  3. Leave it on for at least 20 minutes and then wash it off. 
  4. Follow up with a moisturizer. 


How It Works 

  • This is the simplest of all DIY foot scrubs, but it does an amazing job of keeping your feet happy and moisturized. 
  • The sugar granules gently scrub the skin, and the essential oils comfort your feet.


[DIY] Tea Tree Oil And Mint Foot Scrub

DIY Foot Scrubs – 20 Recipes To Pamper Your Tired Feet

DO-It Yourself
Homemade Tea Tree Oil & Mint Foot Scrub


You Will Need 

  • 1 cup bath salt 
  • 2-3 drops tea tree essential oil 
  • 2-3 drops peppermint essential oil 
  • 2 tablespoons olive oil 


Method 

  1. Combine the sea salt and the oils in a bowl until you get a paste. 
  2. Apply the paste on your feet and scrub for 10 minutes. 
  3. Wash and follow up with a moisturizer. 


How It Works 

  • The essential oils soothe your feet and kill any bacteria and germs present on them 
  • The salt acts as a scrub that removes dirt and dead skin cells from your feet. 


 Note: 
If you have cracked heels, the essential oils might sting a bit. But there is nothing to worry.


Saturday, June 20, 2020

[DIY] Rose Clay Face Mask

Rose Clay Face Mask | Recipe | Clay face mask, Homemade face masks ...

DO-It Yourself
Homemade Rose CLay Face Mask


What you’ll need:

 – 1 tablespoon of Rose Water
– 1/2 tablespoon of Aloevera gel
– 1/2 tablespoon of Organic French Pink Clay


 What you need to do: 


  • Mix all the ingredients in a bowl. If necessary, you can add more Aloevera gel or Rose water according to your liking.


Saturday, June 13, 2020

[DIY] Rose Water Face Mist

Image result for diy rose water face mist

DO-It Yourself
Homemade Rose Water Face Mist


What you’ll need: 

– Filtered water
– 1 tablespoon of Rose Water
– 2 drops of Rosehip Seed Oil
– 2 drops of any essential oil of your choice, we recommend using Rose or Lavender

What you’ll have to do: 


  • Add 1 tablespoon of Rose water into the filtered water and boil it. 
  • Wait it to cool then add 2 drops of Rosehip Seed Oil with 2 drops of the essential oil. 
  • Pour it into your spray bottle, shake well and use.

happy crafting


[DIY] Rose Water Toner

Image result for rose water toner diy

DO-It Yourself
Homemade Rose Water Toner

What you’ll need:

 – 1/4 cup of Witch Hazel
– 1/4 cup of Rose Water
– 5 drops of Rose Essential Oil


 What you need to do: 


  • Combine the three ingredients together in a jar or spray bottle and shake it well. 
  • Spray it on a cotton pad and try it on your skin.


Saturday, May 30, 2020

[DIY] Berry Refreshing Natural Lip Balm

E.l.f. Essential Lip Balm Tint Review | Beauty in Budget Blog

DO-It Yourself
Homemade  Berry  Refreshing  Natural  Lip  Balm


What You’ll Need: 

  •  Beeswax 
  • Refine Shea Butter 
  • Sweet Almond Oil 
  • Refined Coconut Oil 
  • Pomace Olive Oil 
  • Peppermint Essential Oil by Yein & Young 
  • Mixed Berries Lip Balm Flavor 
  • (Optional) Lip Liquid – Red  
  • Glass Pipette 
  • Metal Scoop/Glass Beaker 
  • Cooking Pan/Pot Glass Stirrer 
  • 5 Lip Balm Tubes (5ml each) 
  • Kitchen Scale


Instructions 

  1.  Add 2 tbsp of Natural Refined Beeswax Pastille and 1 tbsp of Refined Shea Butter in the metal scoop/glass beaker. 
  2. Place the metal scoop/glass beaker over a pan of water on a stove, and melt the contents. Stir occasionally to make sure the contents melt evenly.
  3. Once melted, add 1 tbsp of Sweet Almond Oil, Refined Coconut Oil, and Pomace Olive Oil. 
  4. Stir until it’s evenly blended. Remove the metal scoop/glass beaker from the pan.
  5.  Add 5 drops of Mixed Berries Lip Balm Flavor, and 2 drops of Peppermint Essential Oil. Stir to blend. 
  6. (Optional) Add in up to 5 drops of lip liquid to give your lip balms a light tint! Stir to blend again.
  7. Pour mixture into lip balm tubes. Set it aside for it to harden and cool before capping the lip balms.

    *Note: Make sure that your lip balm containers are screwed all the way down before pouring your mixture in, or you’ll end up with short lip balms!


Saturday, May 23, 2020

[DIY] Orange Rose Bath Bombs


Intergalactic | Bath Bombs | Lush Cosmetics
DO-It Yourself
Homemade Orange Rose Bath Bombs


What You’ll Need: 

  •  Sodium Bicarbonate 
  • Citric Acid 
  • Epsom Salt 
  • Pink Scrubbing Salt 
  • Jojoba Oil 
  • Calendula Oil 
  • Rose Water 
  • Sweet Orange Essential Oil 
  • Clear Round Plastic Bubble Mold – 6cm each 
  • Big Mixing Bowl 
  • Beaker 
  • Gloves (wear them when mixing the ingredients!) 
  • Digital Scale 
  • Spray Bottle (for spritzing rose water in case the bath bomb mixture isn’t wet enough)


Instructions 

  1.  In a big mixing bowl, add 230g of Sodium Bicarbonate, 115g of Citric Acid, 60g of Epsom Salt and 55g of Pink Scrubbing Salt.
  2. Wear gloves and mix the dry ingredients with your hands. Make sure that there are no clumps. 
  3. In a beaker, add 10g of Jojoba Oil, 8g of Calendula Oil, 15g of Rose Water and 20 drops of Sweet Orange Essential Oil.

    *Note: Don’t worry about the oil-water separation in the beaker. It will come together with the dry ingredients in the mixing bowl.
  4. Gradually add the wet ingredients to the dry ingredients in the mixing bowl. Mix thoroughly each time the wet ingredients are added.
  5. Check the texture of your bath bomb mixture. Squeeze a handful and if it doesn’t hold its shape, spritz with Rose Water and mix with each spray. The texture should be similar to wet sand. 
  6. Fill two halves of the clear round plastic bubble mold and gently close it. 
  7. Leave aside for a day so that it can harden completely before removing from mold.

    *Notes:
    a) It’s best to keep bath bombs in an air-tight container so that the oils won’t go rancid fast and the fizziness doesn’t decrease.
    b) These bath bombs are made of natural ingredients and has no additional foaming agents, so it wont bubble as much as other bath bombs that have foaming agents
    .


happy crafting


Saturday, May 16, 2020

[DIY] Cuticle Oil

Cuticle Oil: How Does Cuticle Oil Help Brittle and Weak Nails?

DO-It Yourself
Homemade Cuticle  Oil 


What you’ll need: 

  •  Jojoba Oil (Why use this? Because it’s the closest to the sebum our skin produces!) 
  • Vitamin E Acetate (This type of vitamin only benefits the skin, it does not help to prolong the shelf life of the cuticle oil) 
  • Empty Cuticle Oil Brush Pen or Nail Polish Bottle 
  • Essential Oil (Optional;  recommend using Lavender/Tea Tree EO for keeping your nails healthy and strong, or Peppermint/Sweet Orange EO for nail growth!)


Instructions (for 15ml of cuticle oil) 


  •  Measure out 10ml of jojoba oil and 5ml of Vitamin E Acetate.
    *Note: If the consistency is too watery for you, you can add more Vitamin E Acetate.
  • (Optional) Add up to 5 drops of essential oil. Mix thoroughly before pouring into your container of choice.
  • It’s now ready to use!

    *Note: You can reapply cuticle oil as often as you’d like, but do wait for it to be completely absorbed into your skin before doing so!


[Diy] Aromatheraphy Solid Perfume


Solid perfume
DO-It Yourself
Homemade Aromatheraphy  Solid  Perfume


  • Beeswax 
  • Refine Shea Butter 
  • Sweet Almond Oil 
  • Essential Oils 
  • Container for Solid Perfume 👉 You can use aluminium jars, deodorant tubes, lip balm tubes or glass jars! 
  • Glass Pipette 
  • Glass Beaker 
  • Double Boiler 
  • Glass Stirrer 
  • Digital Scale


Instructions
– Makes 10g Solid Perfume. Takes about 15-20 minutes.


  1.  Add 5g of Organic Yellow Beeswax and 2g of Refined Shea Butter in a glass beaker. Double boil the beaker and stir occasionally so the contents melt evenly.
  2. Once melted, using the pipette, measure and add in 3ml of Sweet Almond Oil. Stir until it’s evenly blended. 
  3. Remove the beaker from the double boiler and allow it to cool a little before adding up to 20 drops of essential oil. Stir again to blend.

    *Note:
    a) Make sure to blend your desired scent beforehand. You can read our blog post here on how to create your own essential oil blend.
    b) If 20 drops seems too little to you, you can add a little more. But, be careful because too much of essential oils may cause it to leak out of the hardened solid perfume afterwards. 
  4. Pour mixture into your choice of perfume container. Set it aside for it to harden and cool before closing the container. 
  5. It’s now ready to use!

Saturday, May 9, 2020

[DIY] How To Make Essential Oil Blends

Healthy Snacks Malaysia - Getting Creative with Essential Oils ...

How to Make Essential Oil Blends


Before you make your own essential oil blend, it is important for you to be able to answer these questions:

  •  Who will be using it? (You? Your family? Your friend?) 
  • What effects must it have? (Just for the smell? Or the emotional/physical benefits?) 
  • When will it be used? 
    • (During the day while you get ready for work/school? 
    • Or during the night when you’re about to sleep?) 
  • Why is it needed? (To help you energize yourself? To calm you down?) 
  • Where will it be used? (In a diffuser? In your soaps? Skincare products?)


These questions are a guide for you to follow during your journey of blending essential oils as each essential oil has its own unique smell and varying benefits and properties. Moreover, some essential oils are organic, some may be too expensive to be used in frequent and large quantities.

Creating Blends 

When starting a new blend, always begin with small batches so you can test your blend without wasting too much.

As a general rule, you can follow the suggested quantities below for your blends:

  •  Top – 20 to 40% of total volume of blend. 
  •  Middle – 40 to 80% of total volume of blend. 
  •  Base – 10 to 25% of total volume of blend. 
 Here are some example blends that you can try out:

  •  To relieve stress: Lavender, Cedarwood, Ylang Ylang, Sweet Basil and Lemon 
  • To energize: Sweet Orange, Grapefruit, Peppermint and Rosemary 
  • Immune Booster: Tea Tree, Lemongrass, Eucalyptus and Ylang Ylang


Let It Rest and Test 

Once you’re done blending the essential oils, let the result rest for 24-48 hours. This is so that the chemicals and constituents of the oils can meld and mix together, resulting in a more seamless blend. Afterwards, do test your blend to see if the aroma of it is favourable or not.


Thursday, April 30, 2020

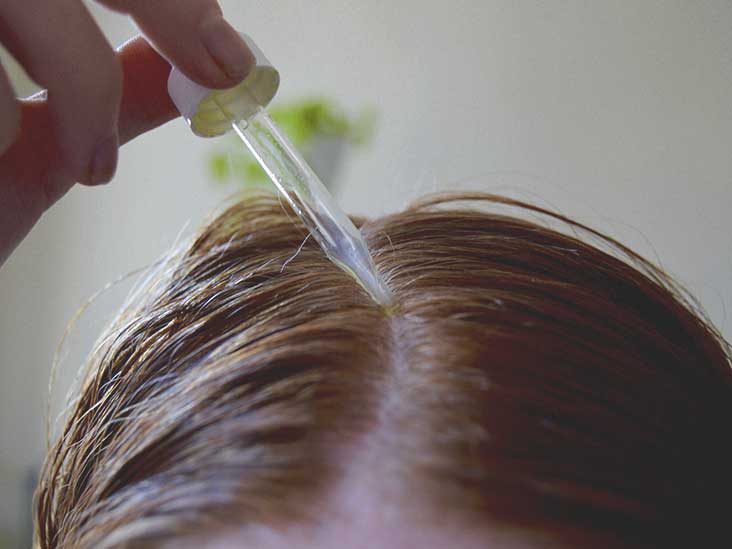
Top 10 Carriers Oils for Hair

9 Essential Oils for Hair Growth & Health: What to Use & How to Use

Top 10 Carrier Oils for Hair


Carrier oils, also known as ‘base oils’, are named as such because they are used to carry essential oils (which have aromatherapeutic benefits) onto the skin. Nevertheless, this does not mean that carrier oils are without their own benefits. So, if you’re looking to have healthy and beautiful hair, these carrier oils are the ones you should try!

  • Argan Oil 
    •  Rich in vitamin E, omega-6 and omega-9. 
    • Argan oil is one of the rarest oils in the world. 
    • It has an amazing ability to moisturize, nourish and improve the condition of your scalp and hair. 
    • This makes argan oil brilliant for dry and/or dandruff-prone scalps, and also for thin, frizzy and/or brittle hair.

  • Apricot Kernel Oil 
    •  A light and emollient oil that’s high in fatty acids. 
    • This ‘lightness’ makes it easy to be absorbed into the hair and scalp, whereas as an emollient, it will help make your hair smooth and pliable. 
    • Apricot kernel oil is also rich in vitamins A and E. It can be used to help seal ends and to prevent split ends. It can also be used to help treat dry, flaky scalps.
  • Avocado Oil 
    •  An intensive and rich oil that has softening and protective properties, along with the ability to promote cell regeneration. 
    • It’s incredibly rich in vitamin D, potassium, amino acids and protein that can stimulate hair growth. 
    • It is also effective in unclogging hair follicles, keeping your hair moisturized and soft, and also assists in hair regeneration. 
    • Brilliant for damaged hair and for boosting hair growth.
  • Castor Oil  
    •  Very thick and viscous which makes it useful to lock in moisture. 
    • Castor oil has a ricinoleic acid content that’s perfect for strengthening roots and nourishing the scalp. 
    • It also has antibacterial, anti-inflammatory and anti-fungal properties which can help treat scalp infections, and is rich in many other essential nutrients that can treat damaged hair. Though, this oil may not always suitable to be used in large amounts on it’s own for hair care
  • Coconut Oil 
    •  Our coconut oil is light, non-greasy, non-staining and liquid oil. It’s rich in antioxidants like vitamins E and K, which help repair and build healthy tissues, strengthening the hair and preventing it from breaking and thinning out. The fatty acids present can reduce inflammation and repair scalp and hair damage. It’s also an effective moisturizer, thus it can help treat dry scalps.
  • Jojoba Oil 
    •  Easily absorbed due to its nature being similar to the sebum naturally produced by our body, doesn’t clog pores and perfect for sealing moisture, jojoba oil is effective for those with dry and normal hair types who want frizz-free and shinier hair. 
    • Moreover, it prefect as an oil cleanser, and can also help promote hair growth. It also has antimicrobial and anti-inflammatory properties which can help your scalp.
  • Olive Oil 
    •  Great for treating hair and scalp issues like dandruff, dry and flaky scalp, and frizzy hair. 
    • Olive oil also increases the elasticity of hair, strengthening it so that your hair is less problem to breakage or being pulled out. 
    • Moreover, olive oil has a significant amount of antioxidants and it also has antibacterial and moisturizing properties, which helps promote scalp health.
  • Sunflower Seed Oil  
    •  Sunflower Seed Oil has a high omega-9 content, which is known to be one of the essential fatty acids that stimulates hair growth, and prevents brittle hair and hair loss. 
    • Its extremely high vitamin E content can protect skin cells from harmful UV rays. 
    • It’s also packed with vitamins A, B, C, potassium, iron, and calcium which benefits your hair and scalp.
  • Sweet Almond Oil  
    •  Light and quick to be absorbed, Sweet Almond Oil can help improve scalp circulation, stimulate hair growth and minimize hair loss. 
    • It’s a good source of vitamin E and unsaturated fats which can help retain moisture and heal scalps. 
    • It can also soften your hair due to it’s nature as an emollient, while simultaneously strengthening and repairing it.
  • Sea Buckthorn Oil 
    •  A luxurious and exotic wonder oil that contains over 190 nutrients and phytonutrients, including vitamins C, E and A. 
    • Also rich in omega-3, 6, 9 and 7, and has powerful anti-inflammatory properties. 
    • Sea buckthorn oil can repair and assist in the regeneration of cells, increase hair growth and shine, improve blood circulation, prevent breakage and split ends, and more! 


Thursday, April 23, 2020

How To Be Confident


The 10 Steps to Confidence That No One Told You About | Goalcast

How To Be Comfident

“Low self-esteem is like driving through life with your hand brake on.” -- Maxwell Maltz 

 Nobody is born with limitless self-confidence. If someone seems to have incredible self-confidence, it’s because he or she has worked on building it for years. Self-confidence is something that you learn to build up because the challenging world of business, and life in general, can deflate it.

Here are 10 things you can do to build up your self-confidence. 

1. Visualize Yourself as you want to be

“What the mind can conceive and believe it can achieve.” -- Napoleon Hill 

Visualization is the technique of seeing an image of yourself that you are proud of, in your own mind. When we struggle with low self-confidence, we have a poor perception of ourselves that is often inaccurate. Practice visualizing a fantastic version of yourself, achieving your goals

2. Affirm Yourself  

"Affirmations are a powerful tool to deliberately install desired beliefs about yourself." -- Nikki Carnevale 

 We tend to behave in accordance with our own self-image. The trick to making lasting change is to change how you view yourself. Affirmations are positive and uplifting statements that we say to ourselves. These are normally more effective if said out loud so that you can hear yourself say it

We tend to believe whatever we tell ourselves constantly. For example, if you hate your own physical appearance, practice saying something that you appreciate or like about yourself when you next look in the mirror. To get your brain to accept your positive statements more quickly, phrase your affirmations as questions such as, “Why am I so good at making deals?” instead of “I am so good at making deals.” Our brains are biologically wired to seek answers to questions, without analyzing whether the question is valid or not.


3. Do one thing that scares you every day 

“If you are insecure, guess what? The rest of the world is too. Do not overestimate the competition and underestimate yourself. You are better than you think.” -- T. Harv Eker 

 The best way to overcome fear is to face it head-on. By doing something that scares you every day and gaining confidence from every experience, you will see your self-confidence soar. So get out of your comfort zone and face your fears! 

4. Question your inner critic 

“You have been criticizing yourself for years, and it hasn’t worked. Try approving of yourself and see what happens.” -- Louise L. Hay 

Some of the harshest comments that we get come from ourselves, via the "voice of the inner critic." If you struggle with low self-confidence, there is a possibility that your inner critic has become overactive and inaccurate. 

 Strategies such as cognitive behavioral therapy help you to question your inner critic, and look for evidence to support or deny the things that your inner critic is saying to you. For example, if you think that you are a failure, ask yourself, “What evidence is there to support the thought that I am a failure?” and “What evidence is there that doesn’t support the thought that I am a failure?” Find opportunities to congratulate, compliment and reward yourself, even for the smallest successes. As Mark Twain said, “[A] man cannot be comfortable without his own approval.”

5. Take the 100 days of rejection challenge 

“No one can make you feel inferior without your consent.” -- Eleanor Roosevelt 

 Jia Jiang has become famous for recording his experience of “busting fear” by purposefully making crazy requests of people in order to be rejected over 100 days. His purpose was to desensitize himself to rejection, after he became more upset than he expected over rejection from a potential investor. Busting fear isn’t easy to do, but if you want to have fun while building up your self-confidence, this is a powerful way to do it. 

6. Set yourself up to win  

“To establish true self-confidence, we must concentrate on our successes and forget about the failures and the negatives in our lives.” -- Denis Waitley 

 Too many people are discouraged about their abilities because they set themselves goals that are too difficult to achieve. Start by setting yourself small goals that you can win easily. Once you have built a stream of successes that make you feel good about yourself, you can then move on to harder goals. 

Make sure that you also keep a list of all your achievements, both large and small, to remind yourself of the times that you have done well. Instead of focusing only on “to-do" lists, I like to spend time reflecting on “did-it" lists. Reflecting on the major milestones, projects and goals you’ve achieved is a great way to reinforce confidence in your skills.

7. Help someone else 

Helping someone else often enables us to forget about ourselves and to feel grateful for what we have. It also feels good when you are able to make a difference for someone else. Instead of focusing on your own weaknesses, volunteer to mentor, assist or teach another, and you'll see your self-confidence grow automatically in the process. 

8. Care for yourself  

 “Self-care is never a selfish act -- it is simply good stewardship of the only gift I have, the gift I was put on earth to offer to others.” -- Parker Palmer 

Self-confidence depends on a combination of good physical health, emotional health and social health. It is hard to feel good about yourself if you hate your physique or constantly have low energy. Make time to cultivate great exercise, eating and sleep habits. In addition, dress the way you want to feel. You have heard the saying that “clothes make the man.” Build your self-confidence by making the effort to look after your own needs. 

 9. Create personal boundaries

“Never be bullied into silence. Never allow yourself to be made a victim. Accept no one’s definition of your life, but define yourself.”-- Harvey Fierstein 

 Learn to say no. Teach others to respect your personal boundaries. If necessary, take classes on how to be more assertive and learn to ask for what you want. The more control and say that you have over your own life, the greater will be your self-confidence.

10. Shift to equality mentality

 “Wanting to be someone else is a waste of the person you are.” -- Marilyn Monroe 

People with low self-confidence see others as better or more deserving than themselves. Instead of carrying this perception, see yourself as being equal to everyone. They are no better or more deserving than you. Make a mental shift to an equality mentality and you will automatically see an improvement in your self-confidence.


Thursday, April 16, 2020

Simple Makeup


We've gone ahead and rounded up six of our favorite face powders: They all have gorgeous finishes and help keep your makeup in place all day long.

Simple Makeup

hollaa.. 
hari nie cik purple nak citer pasal Simple Makeup..
ala.. kalau x citer pon xde laaa korang xtahu  sangat kan..
but.. saja nak buat jadi topikk.. 

antara sebab kenapa kita yang gugirls nie makeup.. sebab nak tutup cela..
nak nampak berkeyakinan .. orang kata boost confident..
nak nampak presentable.. nak nampak cantik..
dan ada 1001 macam lagi alasan mengapa weols pompuans nie dok nak bermekap.. 

so.. kali nie.. nak citer pasal simple makeup..
yang kita boleh apply sentiasa..
walaupon dok kat rumah.. 
so.. kita nampak kemas.. nampak bersih.. nampak cantik.. kat depan mata cik abang kita..
tak gituu.. 

1. Pilih foundation yang light
rasanya korang pon tahu la pasal foundation..
en orang sebelah cik purple nie pon tahu pasal foundation..
so.. cik purple skip introduction pasal foundation tu la ehh.. 
cuma.. kat sini.. kita more focus pada texture & base foundation tu..
tahu kan.. foundation ade banyak jenis..
yang jenis stick la.. jenis water- base.. creme dan lain lain..
so.. for light makeup.. takat dok rumah.. 
guna tekstur yang ringan.. 
so.. muka tu boleh bernafas. 

33 Summer Trend Natural Makeup Ideas You Should Know - Makeup ideas natural - #ideas #Makeup #Makeupideasnatural #natural #Summer #Trend

2. Eyeshadow warna sesuai
warna mata yang natural/nude atau warm color..
mcm coklat.. light orange.. light pink..
kaler yang menyerikan wajah.. tapi lembut..
xde la tetiba korang mekap kaler meriah mcm nak pergi dinner..
nanti risauuuu je cik abang tuu..
takut uols buat party kat rumah pulak.. ehehe

3. Bibir Yang Lembap Menawan
bibir kena sentiasa moist.
apply la lipbalm...kena rajin apply lipbalm ~!!
so.. xde la bibir kering.. 
xde bibir merekah
kalau nak nampak menarik.. pilih lipstik kaler lembut...
tapi.. jangan la pakai jenis matte..
sebab jenis matte nie nampak bibir kita macam kering lesu..
so.. pilih yang jenis sesuai.. 

i think.. 
this all for now..
tunggu next post pulaakk..


Thursday, April 9, 2020

Tips Penjagaan Bibir 2

Kenapa Perlu Pilih Produk Penjagaan Bibir Yang Betul – D'WangiShoppe

Tips Penjagaan Bibir

Korang mesti rasa rimas bila bibir rasa kering dan mengelupas kan? Kejap! Nanti dulu.. jangan kopek bibir tu. Kalau kopek confirm lah berdarah. Tu belum lagi bibir merekah, nak senyum atau ketawa sikit pun dah pedih. 

 Banyak faktor yang menyebabkan bibir korang jadi kering dan merekah. Antaranya ialah cuaca dan suhu yang terlalu panas atau terlalu sejuk, dehydration, bernafas melalui mulut, makanan yang berasid, masin atau pedas dan juga penyakit-penyakit tertentu. Jadi kat sini admin nak kongsikan dengan korang cara penjagaan bibir yang betul.

 Pakai Lip Balm 

Penting untuk korang sentiasa pakai pelembap bibir atau lip balm untuk pastikan bibir sentiasa lembap dan segar. Selain lip balm, korang boleh juga sapukan minyak yang mengandungi bahan-bahan semula jadi seperti minyak badam atau minyak kelapa dara.

Madu Sebagai Pelembap Bibir 

Untuk pengetahuan korang, madu juga bertindak sebagai pelembap dan korang boleh lah cuba sapukan pada bibir. Make sure madu yang korang gunakan tu madu asli tau sebab kebanyakan madu yang dijual mengandungi campuran gula dan bahan-bahan lain.

Scrub Bibir Juga 

Tujuan scrub bibir adalah untuk melembapkan bibir korang dan ia mengandungi bahan-bahan seperti wax, minyak dan butter. Tekstur lip scrub memang agak kasar jika dipegang, tapi ia membantu untuk menghilangkan kulit-kulit mati pada bibir korang.

Terdapat pelbagai jenis dan jenama lip scrub yang dijual di pasaran. Ada yang berperisa cotton candy dan buah-buahan juga tau. Korang boleh lah pilih mana yang berkenan. Kalau nak jimat, korang boleh buat sendiri je scrub kat rumah. Bahan-bahan dia cuma madu dan gula pasir. Mudah kan?

Minum Air Secukupnya 

Badan korang sentiasa memerlukan air, jadi pentingnya untuk korang banyakkan minum air untuk kekalkan hidrasi. Sama juga untuk jaga kelembapan bibir, korang kena lah minum sekurang-kurangnya dua liter air setiap hari.

Jilat Bibir? Stop !!!

Benda ni mesti dah jadi tabiat dan kebiasaan korang kan. Kejap-kejap nak jilat bibir sebab nak bagi lembap. Tetapi kalau korang nak tahu, tabiat ni sebenarnya tak elok tau sebab air liur mengandungi asid yang boleh membuatkan bibir korang lagi kering. Lagi satu kalau bibir mengelupas, jangan kopek. Nanti berdarah lagi pedih!

Gloss Over Matte Lipstick 

Dah jadi trend sekarang orang perempuan suka pakai lipstick matte kan. Sebenarnya tekstur lipstick tu agak kering jadi korang cuba lah bertukar ke lipstick yang mengandungi moisturizer. Kalau nak pakai yang matte jugak, jangan lupa pakai pelembap bibir dahulu.

Sekiranya korang mempunyai bibir yang kering, cuba kurangkan makan atau minum makanan dan minuman yang berasid. Contohnya, buah-buah dan minuman sitrus sebab ia akan membuatkan bibir korang bertambah kering.

Lidah Buaya (Aloe Vera) Beri Kelembapan 

Lidah buaya adalah salah satu tumbuhan yang bagus untuk kulit dan fungsinya adalah untuk memberi kelembapan. Korang boleh beli pelembap bibir yang mempunyai aloe vera ataupun beli gel aloe vera yang banyak dijual di drug store atau pasaraya.